Wednesday, May 29, 2019

Last bit to do ....

I'm trying to get this last section of embroidery done for this top and it is slowly getting there.
Here is a better look at that last section.
The photos don't do my work justice .... because it is absolutely beautiful in person.  Soon, my lovely, soon you will be done and then hand quilting can start.
Not much has been happening lately in my studio.  Too busy with other things.  It is nearly the end of May and cottage time will take me away from my studio.  Hand work will come with me and slowly over the summer months you will see what gets done during this time.

But .... there is always a but, isn't there?  In going through my scraps, if a large piece (6"+) is found, then 6" x 6" squares are cut out and made into these blocks.  I'm just making rows of blocks.  Maybe these rows will be in the same quilt and maybe not.  These will be made into donation quilts.  I'm just making them and putting them in a bin for later.  Pattern is called Winding Trails by Karen Griska.
Oh, and I'm also working on two secret projects which cannot be revealed until much later.  So, I guess I am working on more than first thought.  LOL

Next week, my sister, her youngest daughter and I will be off for a week in Costa Rica.  We have never been there and we are so looking forward to sun and hot temperatures.  It has been a very long winter and a wet spring.

Have a great day!

Linking to:
http://www.esthersquiltblog.com/
http://needleandthreadnetwork.blogspot.com/

Wednesday, May 22, 2019

Down by the Lake

That is the name of this quilt.  The greens and blues at the cottage in spring/summer months.  The red is for the maple trees that turn a glorious red in the fall.  We opened our cottage for the season this past Sunday and I took this quilt out for photos, but it rained and that opportunity was lost.  So, next best is out back of our home.
This was my inspiration.  Blues and greens.  The colours at our cottage.
This quilt has had a lot of revamping from start to finish.  I wanted to design something special, but ended up with just alternating green and blue squares.  My mojo was lost for my original design idea.  In January 2013, I considered it a finished top.  I was so done with this project.
Then in May 2013, I started to tinker with the look.  What about adding some of my favourite stars and some circles?  Yes, I think so.  It took the look from BORING to happy.  As an aid to ensure that stars were appliqued on the right spot (see all the pink squares) and the circles (all the green squares), pieces of paper were cut and then pinned with safety pins in their correct spots.   
There, what a difference that touch of red added.  Just one month and all the applique was added.  Then, it sat on the shelf waiting for it's turn to be turned into a quilt.  For six years!
That red fabric would be perfect for the binding, but where was it?  A search through my UFO bins and it was found!  Eureka!  Now, this quilt is done and we can enjoy it.  Happy days!

Quilt Details:
Started:  June 2008
Top finished:  January 2013 and then finally in May 2013 (for good .... LOL)
Quilt finished:  May 2019
Block size:  4" x 4" squares finished
Quilt Size:  70-1/2" x 86" (before quilting, washing and drying:  72-3/4" x 89")
Batting:  Hobbs 80/20 cotton poly
Machine quilted by:  Kat's Quilts

Have a great day!

Linking to:

Tuesday, May 7, 2019

Oh, just another EPP quilt finished!

LOL ..... this quilt has been sitting on a shelf for almost 2 yrs. since the top was finished.  Just lately, a bunch of my tops have been sent out to a LAer and she is getting them done for me and I am enjoying my quilts so much more than just a top.
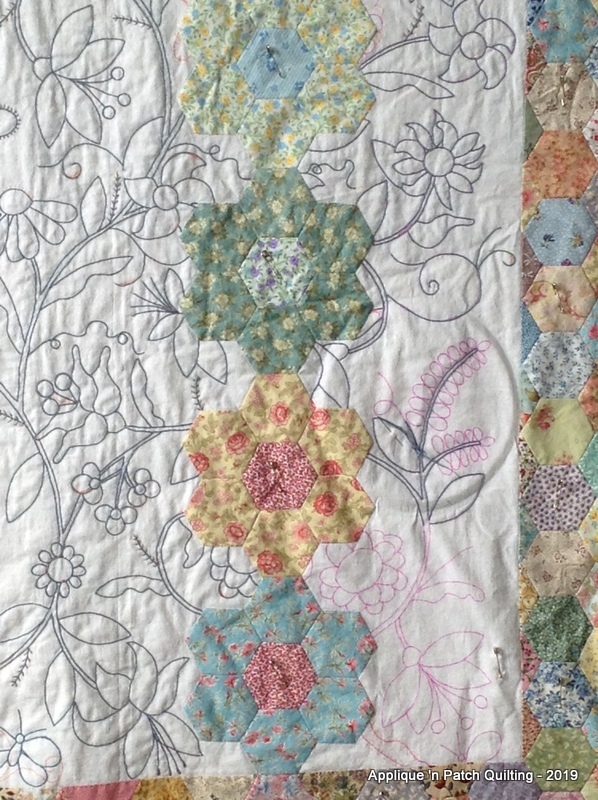
A close-up of the half hexagons (HH) that are made into triangles.  The size of the HH are 3-1/2" at the widest point and 1-1/2" high.  All hand pieced using the English Paper Piecing method.  To make one triangle, you need a light, medium and dark half hexagon.  Once the triangles are made, just rotate them around so that no light HH is against another HH and so on.
To memorialise my precious cats that are no longer with us, I found two cat prints in a stash from someone and I wrote their names on the HH.  This is for Miss Ashes.
 This one is for Miss Hank.  Oh my, how I miss those two girls .....
Where did the pattern come from for this quilt?  I saw a photo in Fons & Porter (March/April 2006) magazine and knew one day that a quilt would be started.  It kept drawing me back to it time and time again.  It won!
Quilt Details:
Started:  Nov. 2015
Top finished:  Aug. 2017
Quilt finished:  May 2019
Quilt size:  62" x 81" (top size:  65" x 85-1/2" before quilting, washing and drying)
Batting:  Hobbs cotton/poly 80/20
Half Hexagon size:  3-1/2" x 1-1/2"
Machine quilted by:  Kat's Quilts

We had a garage day this past Saturday.  Again, we were drooling over projects that were shown.

Here is me showing off my great-niece's quilt.
 Darlene showed her Double Wedding Ring quilt. 
Karin put up her wool applique blocks for us to browse over and switch around to give a balanced look.  She was wondering what sashing colour to use.  We all said black.
 Here is a close-up of some of her blocks.  They are gorgeous.
Karin also showed us another top that she is working on and was wondering what border colour to use.  I suggested a lime greenish colour and told her to go over and put her arm up on the border area.  She had the perfect lime green blouse that was the perfect colour.  The other ladies
 thought yellow/gold would be better. 
So that was our day in the garage.

Have a great stitching day!

Linking to:
http://www.esthersquiltblog.com/
http://needleandthreadnetwork.blogspot.com/

Wednesday, May 1, 2019

Can't let this go

I called this top finished.  Almost two years ago.  It was always my intention to put applique in the side setting pieces.  Instead of just doing the applique, it sat on a shelf as it.  A finished top.  It was back in July 2017 that I last blogged about this top.  Done as far as I was concerned.   Really done?
No.  I just couldn't let this one go as is.  It really needed something to make it better.  Applique flowers as I had originally intended.

That is what is being worked on these days.  Applique flowers.  So, into my drawer of leaf templates and my drawer of circles I go.  A bag of circles that were the correct size and ready to be sewn on was a bonus find!  I just had to make one more circle and that didn't take long at all to do.
Almost half way there.  The difference is pleasing and I'm finally happy with this top.  A smile is on my face as I look at this photo.
This will be my third top that has this flower on it.  Like my stars that show up on a gazillion tops and quilts, this flower applique keeps showing up too.  My signature items to make my quilts my own.
Same flower with more circles added.  These give my borders that extra touch of special.  Don't you agree?
Here is my drawer for circles with leftover circles from past projects.  Those little containers on the right hold all my different sized cardboard circles.  Very handy to pull whatever is needed.
My drawer for leaves and fabric odds and ends to use for making leaves.
All extra leaves from various projects over the years get tossed in here.  This is where I go look first when a leaf is needed for a block.  Very handy indeed.
I'll just tuck that leaf template and leftover circles back into their drawers because one day .....

Have a great day!