Showing posts with label A Scrappy Garden. Show all posts

Sunday, December 13, 2015

A Scrappy Garden

Well, I hung in there and sewed that last row together and then tackled the borders.

A Scrappy Garden is finally a top!!!  Since the centre is SO busy, the borders had to be plain to give the eye a place to rest.  Yes, this works very well.  This is another big top.  The height is 94-1/2" and the width is 102".  After it is quilted, an overall loss of 4" will occur and then this will be the perfect size for my bed.
A close-up of the border.  That multi coloured stripe tied in all the colours.
 
In case any of you are counting, this is top #26 waiting to be quilted.  OMG!  Can you guess what my goal is for next year?

In case any of you were wondering what else that triangle can be used for, here are a few more ideas:

Rows of these pieces sewn together.  Just trim the sides and what an effect that would be.
My Aussie friend, Jennifer, brought this pattern for me using that same template.
Normally, after doing a big hand piecing project, I'm more than ready to toss those paper pieces into the recycle bin or give them away to another person who wants to attempt this pattern.  This time, I think I will hang onto my drawer of these templates and let a few ideas stew for a while.  :o)
Have a great day!

Wednesday, December 9, 2015

Oh Darn

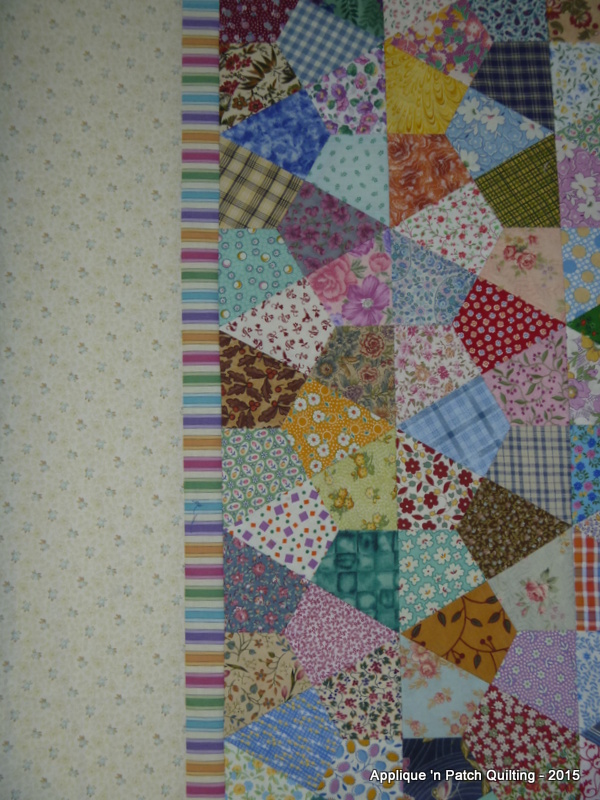
Just when I thought that borders were ready to be sewn onto my triangle quilt, I realized that it was not the right size on the length.  Oh darn .....
So, on that note, more triangles are being cut out for one more row.  Some striped fabric was auditioned for the border, but I'm not sold on it yet.
Now, I have been asked about my triangle pattern.  Where can you get one?  My pattern came from my EQ7 program under One Patch.  It is really a hexagon that has been sectioned off.  I simply turned my hexagons into triangles for ease of sewing.  
 
 If you can't get a hexagon big enough, below is another way that you can make the templates.
Once my paper template is ready and cut out, a plastic template will be made that has a good 3/8" seam allowance.  I allow extra fabric at the seams which is trimmed later.
My plastic template is used for drawing the design onto a piece of fabric.
The design is drawn and will be cut out with scissors.  A good project for catching up on TV programs.
 Here are my fabric pieces ready for the paper templates.
Paper template pinned in place.  See the seams at the top two sides?  Just make sure they measure 1/4".
The two short edges are folded over and basted in place.  This is what it looks like from the front.
This is the back.
Take your ruler and line up 1/4" on one long side.  Trim.
Then do the other side.
Sides are trimmed and ready for sewing.
Place the templates in this order.  You need a dark, medium and light to make a triangle.  You have to be aware of placing each piece so that you don't have a light against a light, etc.  At the sides (see the two arrows), you will need to open up some of the shorter seams that were basted (and this is why it was important to allow the 1/4" seam allowance)

Once you are happy with your placement, it is time to start hand sewing triangles together.  This is what the front looks like.

This is what the back looks light.  If you follow the directions for making your own triangle template, your side should measure 6".  The smaller arrows show the seams sewn together.  At this point, all the basting and paper templates are removed.
You will need some half triangles to finish the sides as shown below.
 Just take your paper templates and cut in half.
 You will need to reverse half of your side templates to get an even edge.
 Once your triangles are hand sewn together, then it is time to start sewing those triangles together.
 This is my system of marking my triangles for sewing so that none of the triangles get messed up.  Trust me, it really is easy to twist those triangles around, even when you mark them.
This is what one row looks like all sewn together.  Happy days!
So, back to cutting and basting to get that last row done.

Have a great day!

Saturday, August 8, 2015

Cottage Quilting

In the past few weeks, my time has been mostly spent at the cottage and visiting relatives.  So, what have I been doing?

My triangles are now mostly in rows and sections.  Great progress has happened.
My last two rows are in these baggies.  Ohhh .... getting excited!
What else to work on at the cottage?  My apple cores have come out once again.  I'm on Section C of my scrappy method.  The link is for a different project, but the method is the same regardless of which project I'm working on.

Also, my split apple cores.  Same scrappy method applies here as well.
Lately, I have received questions about my triangles and where to get the pattern and what thread do I use for applique and for doing EPP.  Both these questions will be addressed in an upcoming post.

Have a great day!

Tuesday, July 14, 2015

Halfway there ...

Doing a row a day helped to keep me on track.  This is the halfway point.  A few rows of the bottom left hand section has been removed and placed in my take-along tote that was recently shown.
Oh, this feels so good!  I will be so glad when this top can be totally removed from my design wall.

I did have a thought for borders, but it didn't work out.  So, I have to put on my thinking cap and come up with something else.

Since this is my take-along project, what else can I work on?

Have a great day!

Friday, July 10, 2015

A Scrappy Garden

Well, well ..... after a lot of basting, the last quarter is ready for sewing.  I'm not out-of-the woods yet .... there is a lot of stitching to be done; but this sure makes me happy.
The upper half section is being sewn into rows, where you see the arrows.  Until the bottom left hand section was pinned into place, nothing could be done with the rest as I needed to see how everything looked first to make sure the overall look was balanced.
This will be my take-along project this summer to the cottage.  Lately, I've been back and forth to the cottage a lot and Miss Ashes has been feeling neglected.  She is giving me the look and touching my arm to make sure that it really is me.  :o)
In the photo below, what do you think about my abstract deer?  Take a close look just at the water line to the left of the big tree.  What do you think?  Am I seeing things?
Nothing abstract about this pheasant.  It has been hanging out at the back of our cottage.
Have a great day!

Thursday, July 2, 2015

Triangles again

This is it ..... 3/4 done.

Now, the time has come to haul out all the fabric triangles that have been cut out and the paper templates and start basting them.  A great take along project.  Oh Happy Days!

Have a great day!

Sunday, June 28, 2015

Triangles

My Scrappy Garden top is close to being 3/4 of the way done. 


The section that you see with the arrows above .... well they have all been pinned onto my new tote. 


I just recently made this tote and love it for hauling around my EPP projects to work on.  Perfect for this summer at the cottage.  This tote is also my OPAM for June. 


I've been having some computer woes and that is one reason why there hasn't been a post for the last few weeks.  Friends have been complaining.  To load photos, I have to use my hubby's computer and then use my computer to do the text.  A pain for sure.

In the beginning, I was able to load photos using Internet Explorer and then I couldn't.  Firefox worked great until recently when my computer has been entirely blocked from using that browser.  My only hope is Google chrome.  Those with blogs .... what are you using?

Oh well, have a great day!

Sunday, December 14, 2014

A Scrappy Garden

With Xmas only a few weeks away, I need to start finishing up a few gifts.  They can't be shown right now .... but here is something new that I've been working on since the beginning of December:

The progress has been amazing.  Thanks to my stash, it has been a blast going through and pulling fabrics out of bins.
The more pieces got made and pinned onto my design wall, the more I wanted to just work on this project.

 Just a few more pieces to be added and then this will be 1/4 of the quilt (queen size).
Just one patch makes up this triangle.  It is known as Colonial Garden.  My quilt will be called "A Scrappy Garden".  To get a good flow of colour throughout, a dark, medium and light value fabrics are used for each triangle section.  Simple as that.
My triangle is made using the EPP (English Paper Piecing) method, but only three sides are sewn together by hand.
 Below are two triangles sewn together by machine with the seams pressed open.
This new project brings my EPP projects on the go to number three. My other projects are my Apple Core and Split Apple Core.  Oh joyful days are ahead for me!!

There will be a fourth EPP project ... but not just yet.  Have you seen this on:  http://faeriesandfibres.blogspot.ca/p/patterns.html.  Click onto
81 – The Giant Monstrosity by Karen H 2014 (just below the photo) and it will bring you to a link for her pattern that she has made for free.  To me, Karen is The Hexie Queen and she has offered tutorials on how to do different hexagons and stars!  You really need to check out her blog.

Have a great day!