Wednesday, May 28, 2008

The little quilt that Grew


Originally, this quilt was to be wall size …. but it dictated otherwise. This is what I have been working a lot on lately. There are just four more blocks to do and then time to tackle the borders. Doing borders is a drag and they tend to stall me; but I am anxious to get to the top stage.

The Lover’s Knot blocks are so numerous that they no longer fit onto my design wall in my studio. I had to move everything upstairs to my dining room (the table and chairs all had to be moved out) and pin the batting holding all the blocks onto a quilt that is currently hanging on the wall. This way, I can get a good view and switch any blocks that don’t belong and hopefully achieve a balanced look throughout the quilt. So far they all look good. There may be a few blocks that are a bit on the bright side. I will leave them in as they give the quilt a bit of punch.

LOL …. Don’t I look comfy on the floor? Getting up and down just isn’t as easy as it used to be and while I was down there, my DH snapped a photo of me.

Have a great day!

Friday, May 23, 2008

My Gracie Has Arrived!


Whew ... was getting worried about receiving my 4 Seasons Spring Swap. Thought it might have been lost in the mail …. but the post was just slow in getting here.

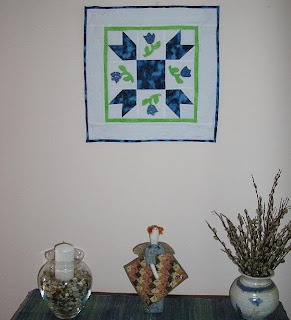
It arrived safe and sound and is being proudly displayed. It is a perfect match to a quilt that is currently hanging on my dining room wall. Grace did a wonderful job! Everything and I mean EVERYTHING is hand pieced and hand quilted. Even the binding is hand pieced. For the past wee while, Grace has been living in a motel room between moves and she had a hard time finding a space to work on this quilt. So, I certainly appreciate the time and effort Grace put into the making of my wee quilt.

Included in my package are some sticky notes which will always come in handy.


Thank you, Grace!

Tuesday, May 20, 2008

My Humble Quilt


We all have to start somewhere …… and this is one of my firsts. A few years ago, when my SIL saw this photo, she asked me “what is it?”. The look on her face said it all. Bet you are asking the same, too. :o)

Click on the photo.

Do you see the roads and all the scenic items all along the way? This was made for a nephew when he was very young. He had all of those wee cars and I thought that he could play with them on his quilt during his downtime. He loved that quilt and it was on his bed until his teen years.

The centre is a printed panel and the piano keys are out of poly/cotton fabric and it was hand quilted. My sister still has that quilt stored away for him.

Gosh, how proud I was of this masterpiece. I even brought it into work and showed everyone. I’m glad that I made this quilt. We all have to start somewhere and this was just one step on the road of creating.

Have a great day!

Friday, May 16, 2008

Some of my hang-ups


Seriously, now, do you really expect me to reveal them to you? :o) The hang-ups that are being referred to are these. This is what I use to hang up my wee swap quilts to wall hangings.

Any kind of ruler or flat molding for windows or picture frames or carpet stops are used. The ones that you see with the green masking tape are two different sizes of carpet stops that are just taped together to extend to the correct size to fit my wall hanging.

I use Command wall tabs and just one of them will hold up a wall hanging …. they are that strong. You can use two tabs (see the arrow) placed close together on the wall so that your quilt doesn’t wobble.

When I use a thin plastic ruler and it tends to flop forward when my quilt is hung, I use a piece of cardboard from a cereal box and just fold the piece until I get the right size to just slide the cardboard against the ruler to make the fit tight and the ruler doesn’t flop.

With all the mini swaps that I have received, and those still to come, I want to group them together on one wall and these rulers, etc. will all come in handy. The beauty of using the Command tabs is that I can easily pull them off and there is no hole left in the wall.

Have a great day!

Monday, May 12, 2008

Flowers From Afar


My 4 Seasons Spring quilt has been delivered to Bren …… and she loves it! Oh, happy days, for sure.

Yo-yo’s, beading, embroidery, ribbon and buttons ….. all were used to bring this quilt together. Those little buttons have been in my stash for many, many years and they are a perfect match for this bouquet. Still have a ton of beads, though, to use up.

There is machine stippling surrounding the flowers, stems and leaves. The embroidery, beading and buttons were added on afterwards and are laying on top of the stippling.

The ribbon is recycled from a gift that Peg sent to me. You just never know when something can be used again elsewhere. So, Bren ….. there is a lot from me and a bit from Peg in your quilt.


It was really hard to finish off this quilt. Ashes kept coming over to help me and while hand quilting, Hank had to lay down inside the hoop on top of the quilt to make sure that the tension was just right for quilting. Now, I have learned to work on finicky stuff while they are snoozing upstairs.


Have a great day!

Friday, May 9, 2008

Winter Tips


Naw .... not for ‘that’ kind of winter. The following tips are for my ‘Winters of My Life’ quilt on the previous posts.

I love to combine machine and hand quilting on the same quilt. There are drawbacks to this kind of quilting, though, and my quilt had problems. It would not square up ……. and I’m talking major out of whack.

Since there was a lot of close stipple quilting, the quilting really shrunk together a lot in those areas and my hand quilting was not so closely quilted and I could see differences right away between the blocks. I should have taken a ‘before’ photo so that you could really see the difference. Next time, I will be sure to do that for you as I will be combining the two methods again.

What to do about it? Well ….. for one thing …… I use long lengths of quilting thread and don’t tie them off when I get to corners or at the selvedge edges or even in the middle of the sashing. Once my quilt is finished and washed and blocked and dried, those loose ends will be used to help square up the quilt.

I grab those threads and start to gather up the quilting in the borders and in the sashing and in the ditches until I start to see that the quilt is squaring up. The threads are not gathered up too much in one area but are gently gathered up from one end to the other. This method is subtle and hardly noticeable in the end; but my quilt is finally square and then the threads are popped into the quilt and trimmed off.

The other problem was with my free form piecing of one tree. There was just not enough material in the seam and after being quilted, the seam came loose and there was a gap. What to do? A scrap of the same material patched it up. You really have to look closely to see the patch.


When I bought the snowflakes, they were white. Three were needed to stand out against the white background; so I painted them royal blue. There is a clear coating on top so that the paint won’t rub off the buttons.

Have a great day!

Tuesday, May 6, 2008

I'm Charmed!


I won, I won! Yipee …… Olde Town Quiltery had a giveaway a few weeks back and I was the lucky winner! Today, my charm pack arrived and I’m doing the happy dance.

I’ve wanted to make a wall hanging to go along with this quilt. The squares in this charm pack are perfect match ……. so there will be something to show in a wee while.

Recently, I stumbled across Quilting Gallery. This site has quite the list of quilting blogs, plus there are links to free patterns, etc. Check it out!

Have a great day!