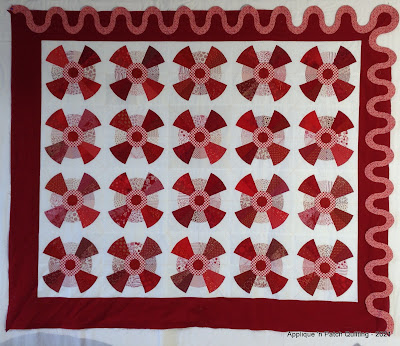
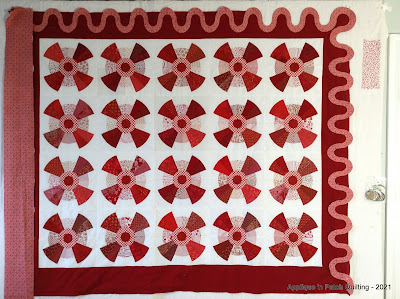
I knew that if I concentrated on just one project at a time, great progress could easily be seen. That is what happened to my "Gingham Swirl". This is the only project that has been steadily worked on for the past two months and what a difference already. This UFO had only one block made when the bin was pulled from the shelf back at the end of August. Since then, wholey moley ..... much, much progress has been made.
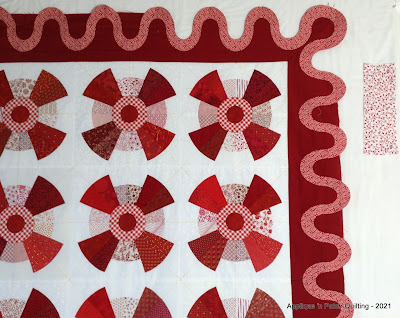
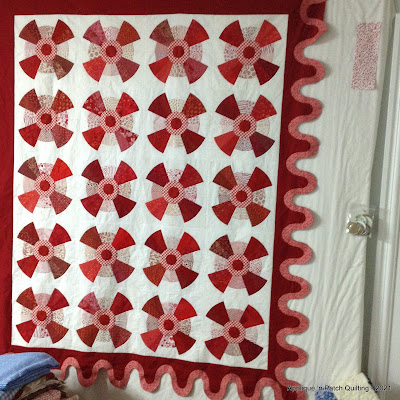
Below shows two borders with the scroll basted in place. Why basting? That way, I don't have to deal with pins galore nor my scroll shifting during handling and storing when it is not being worked on.
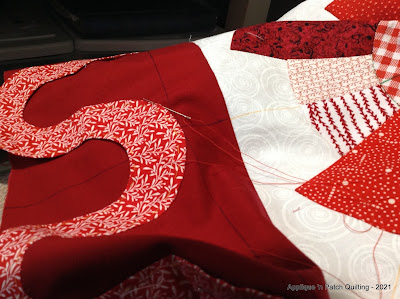
Stitching down those edges takes time, but so relaxing. Only the one edge is being sewn down because there is a reason for that.
Can you see the upper right hand corner? See how the red in the upper part is cut away?
Close-up of the cut-out area. See the piece of red print fabric on the right? That will be inserted in the cut-out area. That is why only the one edge of the scroll has been sewn onto the dark red fabric. Oh, fun, fun, fun!
When I sent a photo to a friend, she oohed and aahed and asked if that was easy to do.
Well, yes and no. It depends on your skill level and if you are daring to give it a try. I'm always ready to try something new, so why not! LOL
So, how is this scroll border actually done? Now, I'm not clever enough to design this border myself. Oh no, not me! It is available through EQ7 (which is the version I have). After playing around with the software, this is the design that came about. The tricky part is putting it together.
There are different versions of applique, but this is the method that I use.
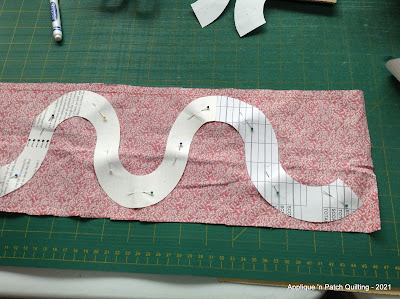
Through the software program, I was able to print out the border shapes. Then a whole bunch of paper templates were cut out and taped together. On the left side is my white paper template ready to be used. So as to not get my template twisted around, it gets pinned onto the border to make sure it will fit ok before cutting out.
Then over the paper template, my fabric (that the scroll is made of) is placed on top and a couple of pins are used to make sure the template doesn't get dropped when moving the fabric and template to my cutting table.
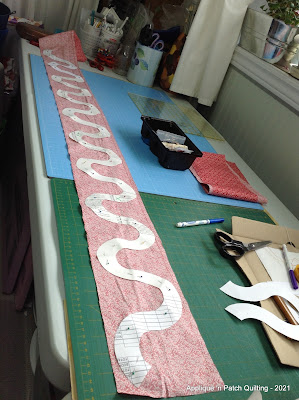
Here is the paper template being pinned onto the fabric. Lots of pins are involved here.
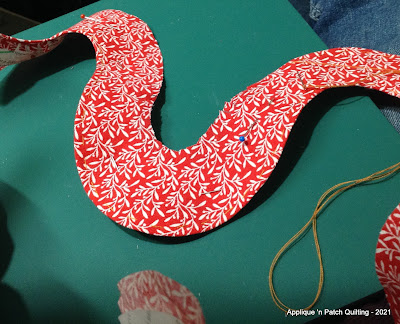
One scroll is now pinned in place ready for trimming away the excess fabric.
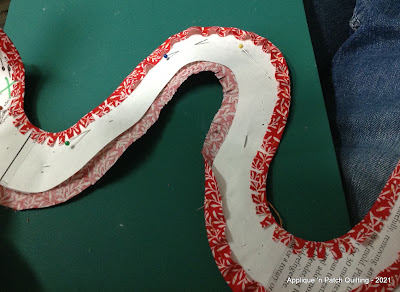
This is the back of my trimmed and clipped piece showing the edges being turned over and basted.
This is what the front looks like.
Below, the scroll piece is being pinned onto the red border and basted in place. Look closely and you can see a horizontal line drawn where the bottom of each scroll is placed and then pinned in place. There are also vertical lines drawn as well for positioning along the border. Those lines help to keep my scroll lined up properly throughout each border.
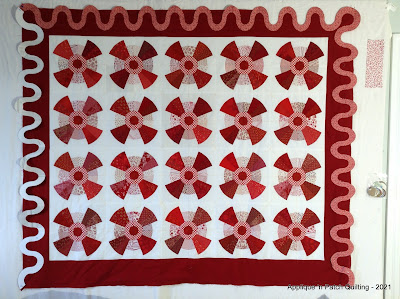
Two edges have been sewn down and the excess red fabric trimmed out. Don't they look lovely? The next two borders have been basted and ready to be sewn. Next post, you will see the next stage of this top. I'm getting excited to see my vision come to fruition.
On the weather front, we did wake up to snow on the ground one morning last week. The snow didn't last, but it was a wake up call to get things done before the cold weather and snow returns for good.
Snow tires are being put on our car today. My windows need a good cleaning and that will happen this week.
More backings need to be done for a trip to my lovely LAer in two weeks' time.
My studio is getting a good overhaul. Magazines and books are being sorted through and they will be donated to our day guild's encore table. Scraps are being sorted for keep, donate or trash. It is time for a good rethink on what I have in my stash and studio.
My studio has become a dumping ground and it overwhelms me sometimes. There is a light starting to peek though the tunnel. Bins are getting emptied and that is encouraging. UFO's are getting done and that is a very GOOD THING!
It is busy, busy time around here.
Cherish your day, cherish you life!


10 comments:
Oh - that is looking so good! Love the different border treatment.
Same wake up calls here! I’d rather be quilting 😂 I did a thorough clean out of my fabric and all that had been dumped in my sewing room and it’s been so much easier to function and a relief to not feel I have to use every scrap or unwanted fabric leftover from projects. As always your quilt is a beauty. Won’t be surprised to see it finished soon.
Oh my goodness, that swirl is so unique and so gorgeous in that colour too. Wow, what a job you are doing with the forming of it and stitching down.
Experience has taught me I need to baste a lot and not rely on pins. Yes, my sewing room get dumped in a lot and every now and then I have to spend my stitching time tidying, if not, I feel overwhelmed. I'm glad I'm not the only one.
Oh, dear girl! You are far more ambitious than I'll ever be with that scrolling! But what an accomplishment it will have been when all done. Way to go. My studio is in good enough shape. I just need to get sewing more.
Wow, Looking amazing!! What a job! My sewing room needs a major sorting and tidying too.
Wow! That border treatment and design is stunning. I thought at first that was going to be the finished outer edge of your quilt and thought that will be fun to add the binding to it. Can't wait to see how the other fabric gets inserted.
that swirl design is totally incredible! thanks for the pics and description of how you did it -- absolutely fascinating. This is going to be one amazing quilt!
That border is spectacular!
I love basting over paper, the results are so accurate and keeps everything stable. This will be stunning when it's finished
Oh Wow!! That border twirling around your pretty gingham swirls is incredible. It is amazing how exquisite it looks. You are so very clever. Thank you for showing us the 'how-tos'. I don't believe I have seen a more striking border.
Post a Comment